A Verilog-A Finite Impulse Response (FIR) Filter Implementation

Hello folks, it’s been a while since I wrote something on this blog. I have been quite busy with graduate school so I left this blog aside. Besides, I wanted to write this post because I had a hard time finding material related to the basics of Verilog-A for digital-like modeling of circuits. I think using Verilog-A instead of Verilog in the Virtuoso environment can be less troublesome for simple digital logic. The Verilog requires the Virtuoso Analog Mixed-Signal (AMS) simulator. Moreover, setting up AMS can be quite a pain, it will probably run slower than the same Verilog-A model and AMS has limited simulation functions in ADEL compared to the spectre simulator.

The following Verilog-A block models an FIR filter. The number of filter taps can be set with the “F_SIZE” variable. The output transition between samples can be set with the “trans” variable. In the initial block, the filter coefficients are loaded from a text file, which can be generated by MATLAB for example and transferred to the “coeff” array. The “x_d” vector models the flip-flops inside the FIR. In the continuous block (analog begin) the “@cross” function is an event trigger that will model a flip flop if a certain threshold is crossed. When it happens, the output is calculated by a for loop and the samples are shifted in the “x_d” vector in another for loop.

module yat_FIR(x,clk,y,VDD,VSS);

electrical x,clk,y,VDD,VSS; // I/O and supply ports(VDD and VSS)

integer F_SIZE = 256; // Number of filter taps

real x_d [F_SIZE-1:0];  // Filter flip flops
real coeff[F_SIZE-1:0]; // Filter coefficients
real aux;
parameter trans = 15.625p; // sets transition

integer k,fd,n;
genvar i;

analog initial begin
	
	fd = $fopen("FIR_coefficients.txt","r"); // Coefficients file
	n = 0;

	for(k=0;k<F_SIZE;k=k+1) begin	
		$fscanf(fd,"%f\n",coeff[n]); // Load coefficients to array
		n = n+1;
	end

	for(k=0;k<F_SIZE;k=k+1) begin
		x_d[k] = 0; // Initialize array
	end
end

analog begin

	//posedge detection
	@(cross( V(clk) - (V(VDD)/2),1,10p) ) begin

		aux = 0;
		for(i=0;i<256;i=i+1) begin
			aux = aux + x_d[i]*coeff[i]; // Multiply accumulate
		end

		x_d[0] = V(x,VSS); // insert the input at first flip flop
		for(i=256-2;i>=0;i=i-1) begin
			x_d[i+1] = x_d[i]; // shift the flip flops value
		end
	end

        // Node y voltage receives value of "aux" with transition "trans"
	V(y) <+ transition(aux,0,trans);

end
endmodule
Continue reading

MOSIS Chip Test With NI-6351 Controlled by MATLAB

This post is intended to show the tests of a MOSIS fabricated chip made by the same steps described here. As well as how to perform those tests with the NI-6351 device under MATLAB software.

The MATLAB interfacing became very intuitive compared to the standard NI software. Once the NI-6351 is plugged in your computer, the command “daq.getDevices” returns the data acquisition devices connected:

>>daq.getDevices

ans = 

Data acquisition devices:

index Vendor Device ID                 Description                 
----- ------ --------- --------------------------------------------
1     ni     Dev1      National Instruments PCIe-6351
2     ni     Dev2      National Instruments PCIe-6351
3     ni     SimDev1   National Instruments NI Simulated DAQ Device

Continue reading

Full digital flow with Cadence tools and NCSU standard library


The intention of this post is to show all the steps required to successfully fabricate a chip with Cadence environment using NCSU 0.5um standard digital library. It is important to highlight that this tutorial will show a lot of details that can be adapted to other CAD tools or technologies, it can also be used to implement mixed-signal projects by including the digital layout inside Virtuoso. I find it helpful since it is difficult to find such content on the internet. Likewise, I am not going to go deep on the tools capabilities, but explore the basic steps to have a final product. With the exception of the Cadence tools, you can get a totally free chip using the NCSU design kit and the MOSIS service (if you are attached to a university). The process steps may differ depending on the system is being used.

The beginning of the digital flow starts with a Verilog/VHDL code specified by the desired project. For the sake of simplicity, let’s use a Verilog code which implements a 8-bit counter:

module up_counter(
  out,
  enable,
  clk,
  reset
);

output [7:0] out;
input enable, clk, reset;
reg [7:0] out;

always @(posedge clk)
if (reset) begin
  out <= 8'b0 ;
end else if (enable) begin
  out <= out + 1;
end

endmodule

And its testbench:


`include "up_counter.v"

module up_counter_tb;

wire [7:0] out;
reg enable, clk, reset;

up_counter U0(
  .out (out),
  .enable (enable),
  .clk (clk),
  .reset (reset)
);

initial begin

  $monitor("out=%8b enable=%b clk=%b reset=%b",
            out,enable,clk,reset);
  enable=1;
  reset=0;
  clk=0;
  #1
  reset=1;
  #1
  clk=1;
  #1
  reset=0;
  clk=0;
  #1
  repeat(300) #20 clk = ~clk;

end

endmodule

The simulation can be performed with the NCSim tool “irun”, running on a graphical window or the terminal. To run on a graphical window (SimVision):

irun -gui -access rwc up_counter_tb.v

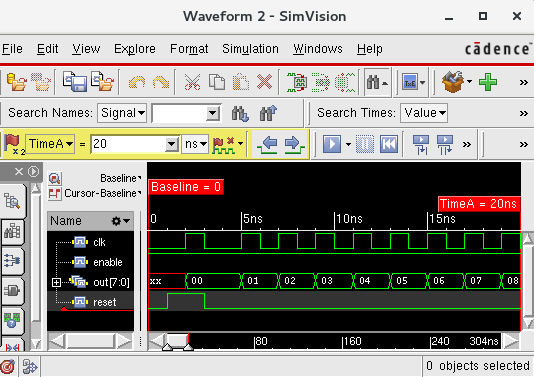
After the window pops-up, click on the instance “up_counter_tb” and after “Send To: Waveform”. Press “Run” and the simulation results can be seen:

SimVision

Continue reading

Digital Image Processing Class: First Unit Exercises

This post is dedicated to the Digital Image Processing exercises with professor Agostinho, which is happening during the second semester of this year. Here, the exercises related to the first unit of the class are going to be listed, to be a part of the class final grade. The OpenCV is going to be the main library used in this course, with the C++ programming language. A simple tutorial can be found on my friend’s website.

All the codes can be accessed by clicking the titles of each exercise.
The root directory can be accessed here.

2.2.1: Negative of a region

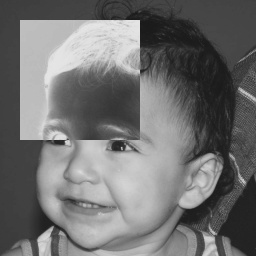
The first exercise is to create the negative of an image inside a given rectangle. The following image illustrates the concept:

negative_img

For implementation simplicity, the images were converted to gray-scale. The trick is inverting the values of the pixels inside the selected region. If we consider the range of the gray-scale to be from 0 to 255, as the following code does:

for(int i=x0;i<y0;i++){
  for(int j=x1;j<y1;j++){
    image.at(i,j)= 255 - image.at(i,j);
  }
}

The user is asked to give the rectangle points at the beginning of execution.

Continue reading

My experience at Gwangju Institute of Science and Technology Global Internship program

gip_participants.jpg

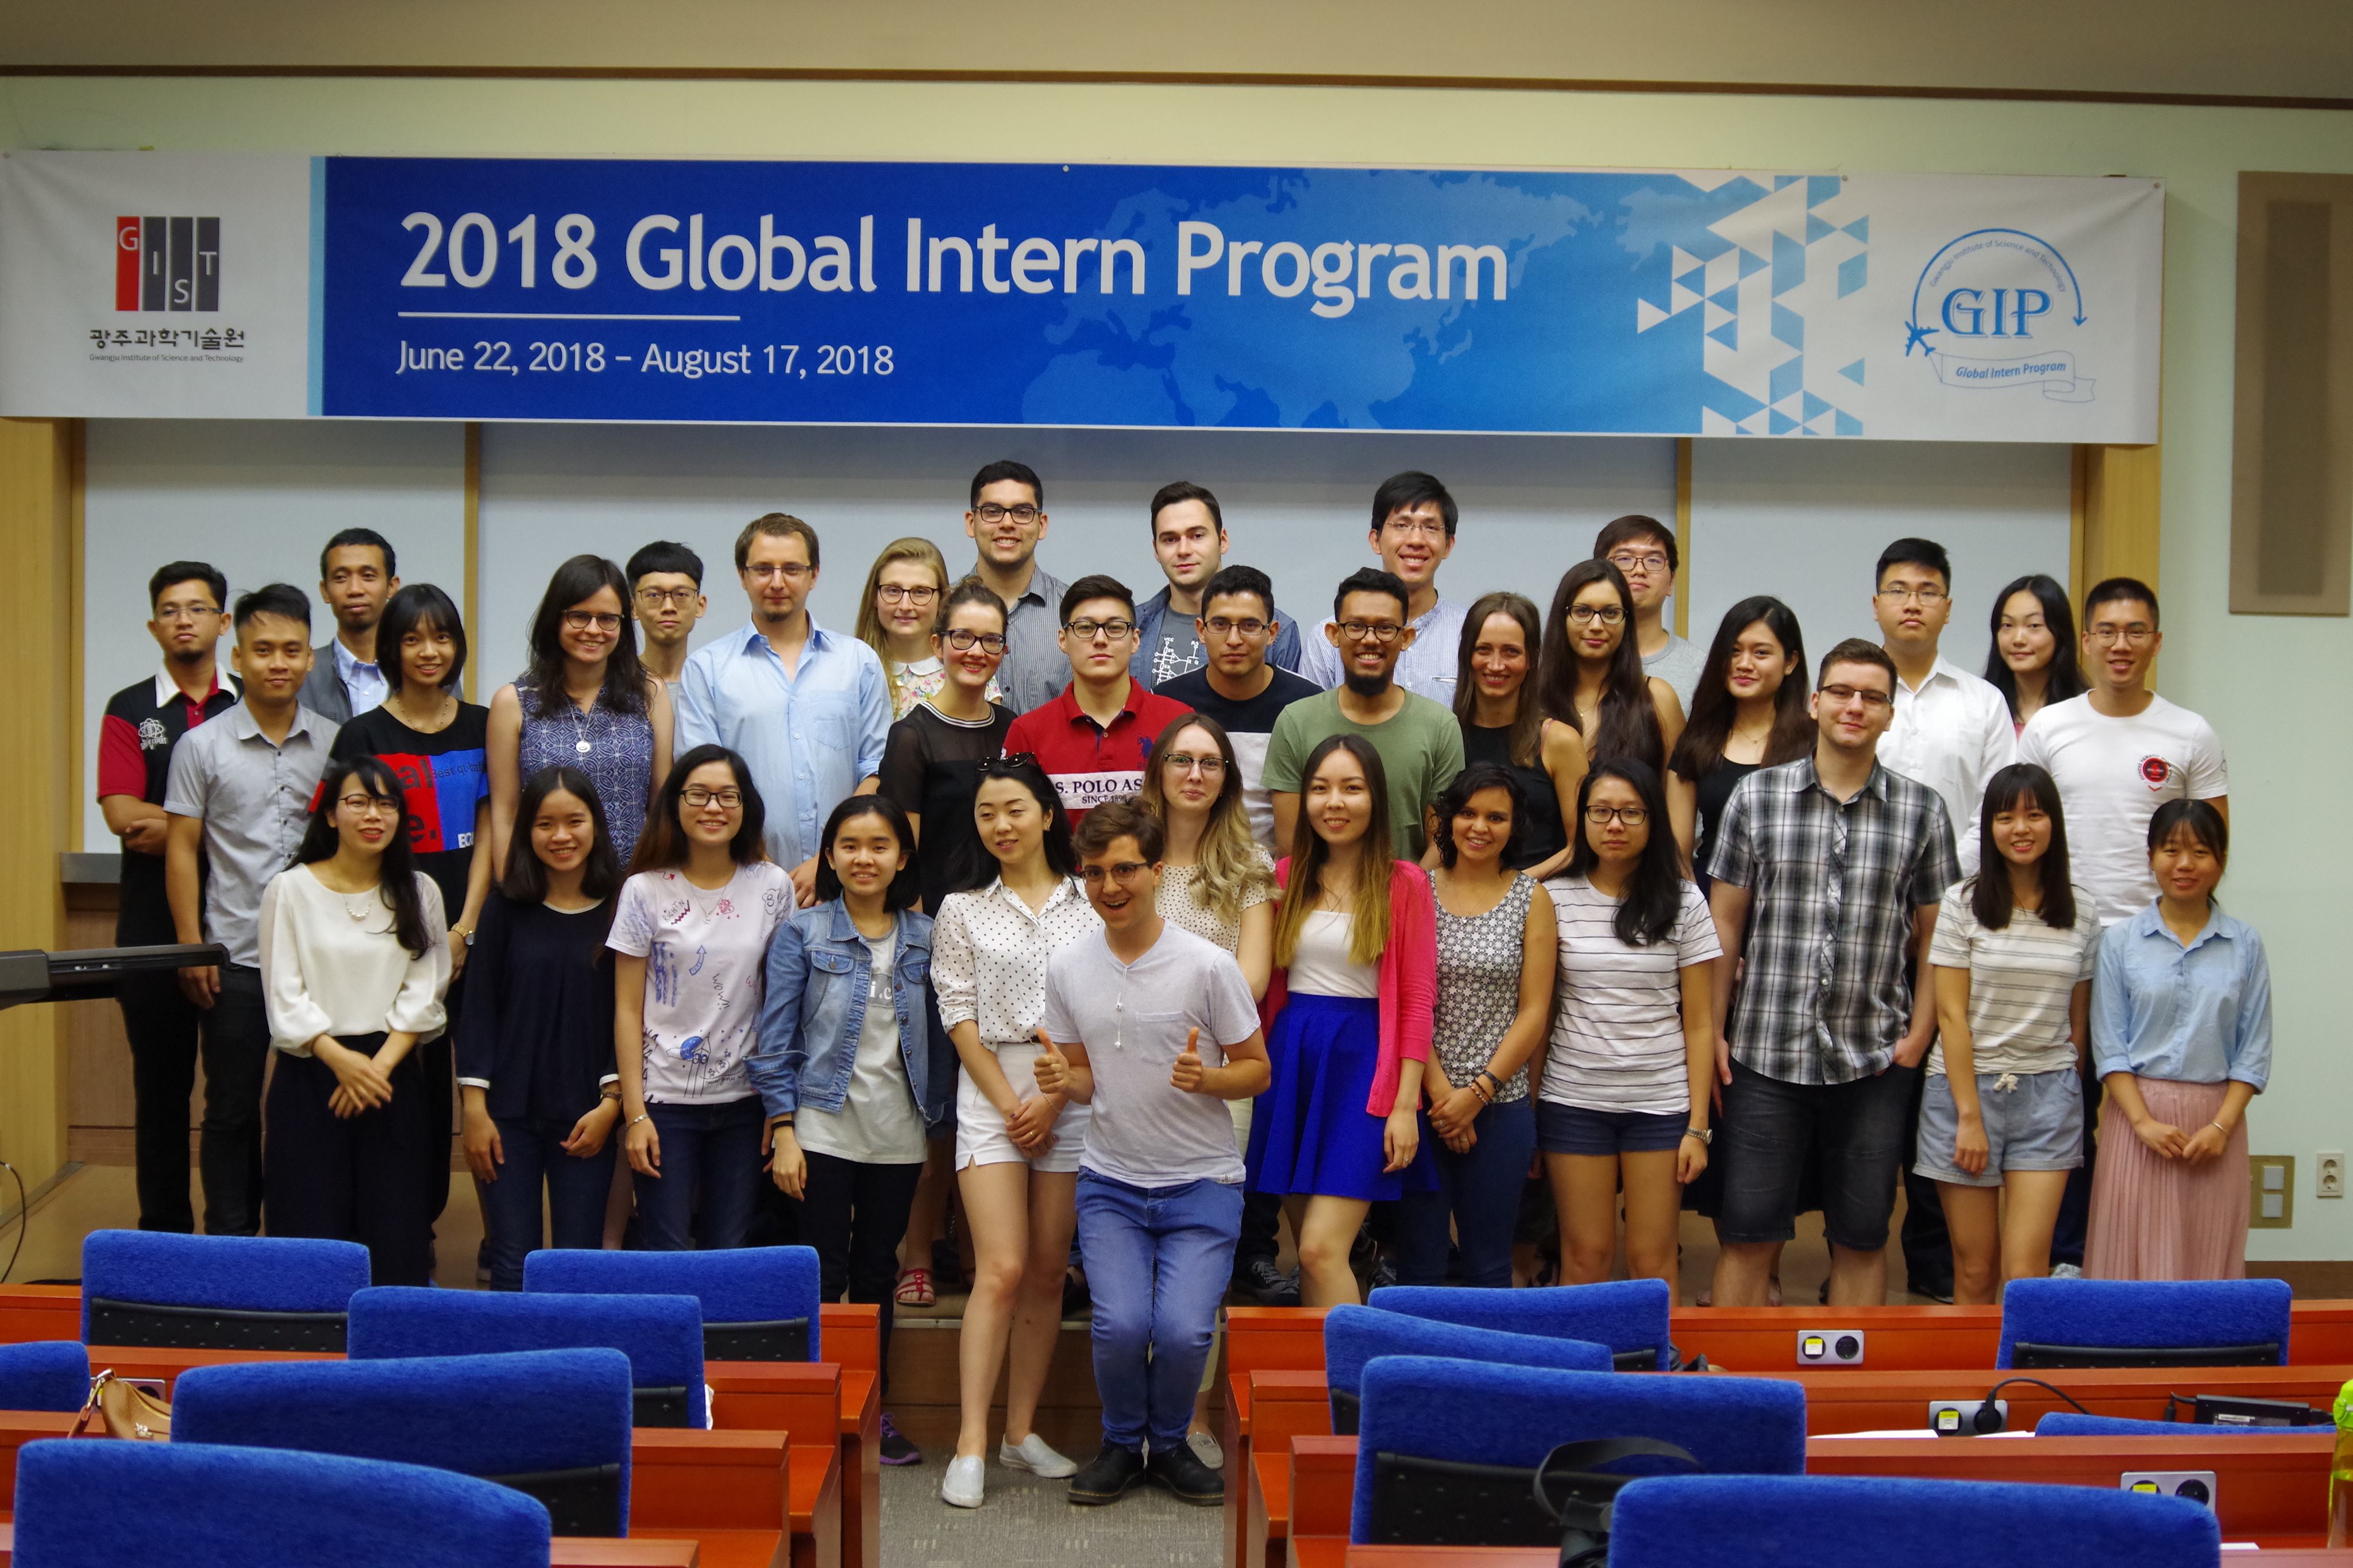
My research opportunity starts with the announcement of an internship program at the city of Gwangju, located in South Korea. My advisor Diomadson saw the GIP flier and noticed me about it. Then, I thought that it could be a great opportunity to enhance my curriculum. With the chance, I started to provide the necessary documents and essays about myself, including academic achievements, personal experiences, and grades. The program details can be found here. The biggest challenge encountered in the registration process was obtaining an English certificate, since many proficiency certificates may take a long time to be got depending on the exam type, and I needed the result fast because I noticed the opportunity late. Luckily, the TOEIC exam is well accepted in a lot of Korean universities as I heard, and it is relatively fast and cheap to obtain its certificate. I recommend new participants to try to do a proficiency exam as soon as possible to avoid deadline issues, but if you are tight on time, TOEIC is a good option to meet this constraint.

I have found many reasons to apply for this program, among them, Korea is a well-developed country in the technology industry which is very interesting for my major. I thought that it could bring me new opportunities and develop my network. The other main reason is to visit my Korean girlfriend, which I had the happiness to meet during an exchange program in the USA.

In the application process, it is required to choose a laboratory where you will be developing your work for two months. From there, I tried to search the laboratory that best fitted with my academic experiences. The ICSL lab seemed to be the best choice, the fields of study are very related to my laboratory in Brazil. So I decided to email the lab professor to assure that it would be a good option. The following paragraph illustrates the email sent and its response.

Continue reading

A way to remove special characters from a text file

Hi everyone! I have been busy for the last months with various duties related to my university classes and research. But now I have separated a little time to write another post! Soon I will bring more contents related to my university environment.

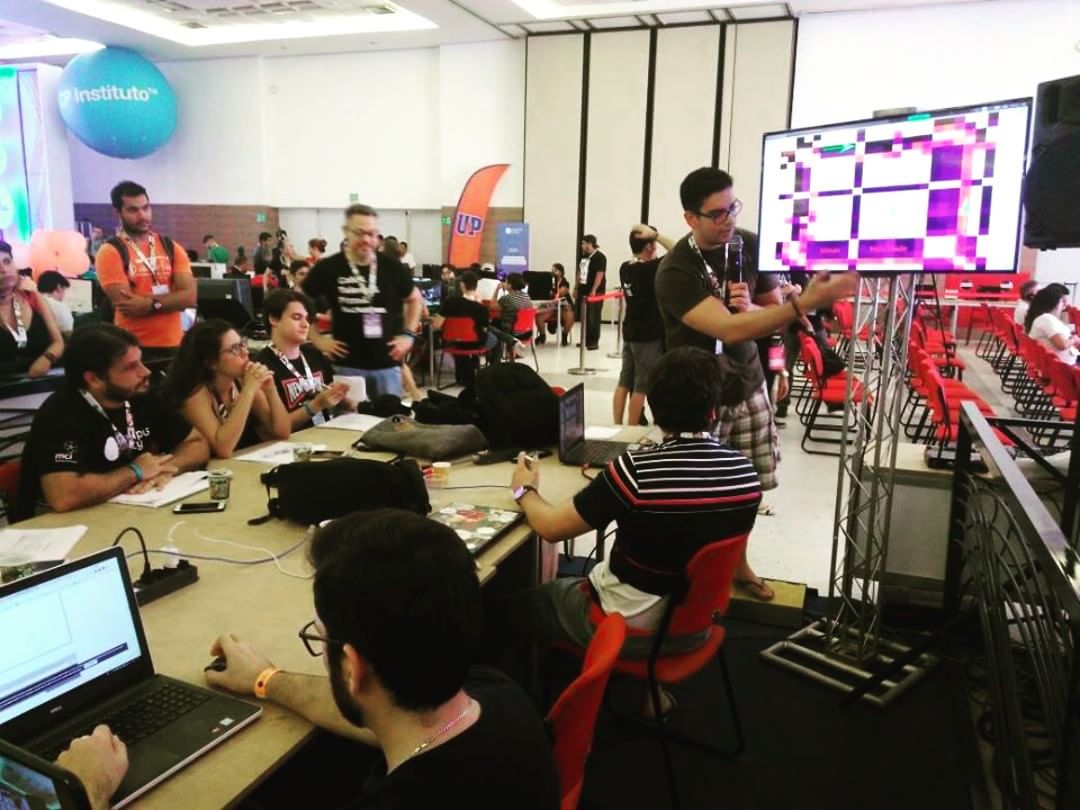
Last month, the campus party happened in my city. So my friends and I decided to participate in two hackathons that happened simultaneously during the event just for fun, which later showed to be a great challenge. The first hackathon involved data science directed to the Brazilian health, and the second one was intended to accelerate the national overall judgment process. In the picture below I am presenting my groups work related to the data science hackathon, the TV shows a correlation matrix made from various databases data.

word

Jumping now to this post purpose!

While trying to develop a solution for one of the hackathons, we had to process the text of pdf files.  To do so, we used the PDFMiner package. The next line illustrates its usage:

pdf2txt.py -o 'output file' 'pdf file'

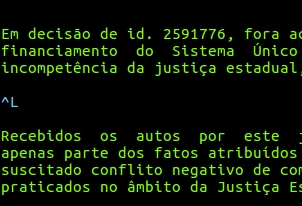
The application seemed to extract the pdf text pretty well, with just one little peculiarity: There were special/control characters (“Ctrl+l”) inserted whenever there was a new page at the original pdf. The picture below illustrates the character with the VIM text editor:

word2

This character got in our way to process the file for our final purpose. At first, we tried to just remove it with ordinary python functions and with different inputs representing the character, without success at the beginning. So we found a pretty interesting solution!


text_file = open('text.txt','r')
text_file = text_file.read()
text_file = repr(text_file)
text_file = text_file.replace("\\x0c","")
text_file = literal_eval(text_file)

The trick consists of using the “repr()” function which returns the completely “raw” string. From there, the special character can be easily identified an removed. In the end, just return the string to the original form with the “literal_eval()” function! The relation of “\x0c” and “Ctrl+l” was found by analyzing the raw text file with the “repr()” function.

I believe this approach can be used to similarly solve other issues involving different characters and programming languages.

Robot path generation from a Genetic Algorithm

The project presented in this post was accomplished during the Artificial Intelligence class given by professor Caroline. It consisted of using the Genetic Algorithm (GA) to make a robot (from the iRobot Matlab toolbox) navigate from a start point to an end point without hitting any obstacles (walls).

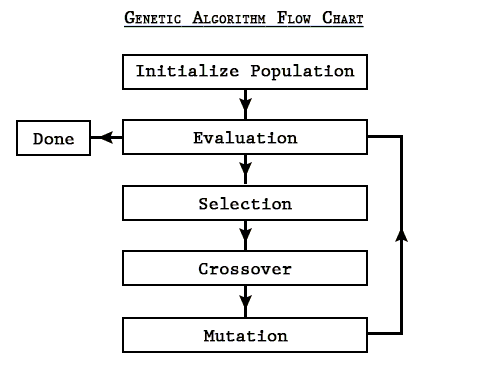
A GA flowchart is shown below to quickly resume the method. At the beginning, a new population of possible solutions is created, each individual of this population can be the solution for a given problem. The population size is strictly fixed to a selected size. Next, an evaluation (or fitness) is applied to each individual of the population, to know how well their solution fits into the problem solution. From there, the process of “evolution” begins, a new generation is created by selecting the best individuals, reproducing them (crossover) and applying a chance of mutation for each individual. At the end, this new generation is evaluated and the process of creating a new generation starts again. The algorithm stops when the evaluation of the population is good enough or the number of generations specified is reached.

flow

source: http://techeffigytutorials.blogspot.com.br/2015/02/the-genetic-algorithm-explained.html

The robot path generation was adapted based on the explanation given of the GA. A brief summary of the developed code in this post is shown:

  1. The start population is created from the possible paths that the robot can follow. Each path (individual) is composed of a sequence of cartesian coordinates (x,y), the path is constructed from the interconnection of those coordinates. It is important to check if the path is valid (no obstacles in the way).
  2. The evaluation (fitness) of the population is retrieved based on the success of the path to reach the destination and the distance traveled from the start point to the finish point.
  3. A new generation is started by selecting the new individuals randomly (Roulette selection) until a selected percentage of the population size. The individuals with the best evaluation have more chances to be selected (Elitism).
  4. The last empty spots of the new population are filled with the reproduction (crossover) of two individuals selected the same way as step 3. The reproduction generates a single child which has one part of the first selected individual and another part of the second individual from a common intersection of both.
  5. With the new population filled, a chance of mutation is applied to each individual. Each Cartesian coordinate have a really small chance of being replaced by another random one. It is also important to check if this new random point is valid to create a path. Mutation is applied to avoid the global minimum solution to the problem.
  6. The population is evaluated again, and the algorithm repeats from step 2 until the requirements are matched.
population_size = 100;
path_size = 10;
%Start point coordinates
start_x = 3;
start_y = 3;
%End point
desired_x = -3;
desired_y = -3;
%survive rate for next generation
keep_alive = 90;
%Number of generations
epoch = 10;
%Mutation chance for each node
mutation_chance = 0.0005; %For each point in the path

Continue reading

A simple chat with Sockets using Python

The following work was developed during the Computer Network class given by professor Carlos Viegas at the Federal University of Rio Grande do Norte. The group was composed of Lenildo and me.

The assignment consisted of implementing a simple chat with Sockets based on a client/server communication. We also needed to insert some functionalities into the application, like changing the name of the user, listing the active clients connected to the chat and even to start a private chat with a specific user. There is no direct communication between clients, all messages need to pass through the server to reach the other end.

Now let’s start to talk about the code!

The strategies to create the system involves using threads to communicate the clients and server parallelly with the help of sockets:


# import libraries
from socket import *
from threading import Thread # thread

Beginning with the server, the following lines were used for the main configuration. It is needed to describe the server IP, port and operating protocol (TCP in our case):


# Server IP
serverName = ''
# Server port to connect
serverPort = 12000
# TCP protocol
serverSocket = socket(AF_INET,SOCK_STREAM)
# Bind the Server IP with its port
serverSocket.bind((serverName,serverPort))
# Ready to receive connections
serverSocket.listen(1) 

Continue reading

Analyzing the state of the Basic Health Units of Brazil (UBS) using Python for Data Science

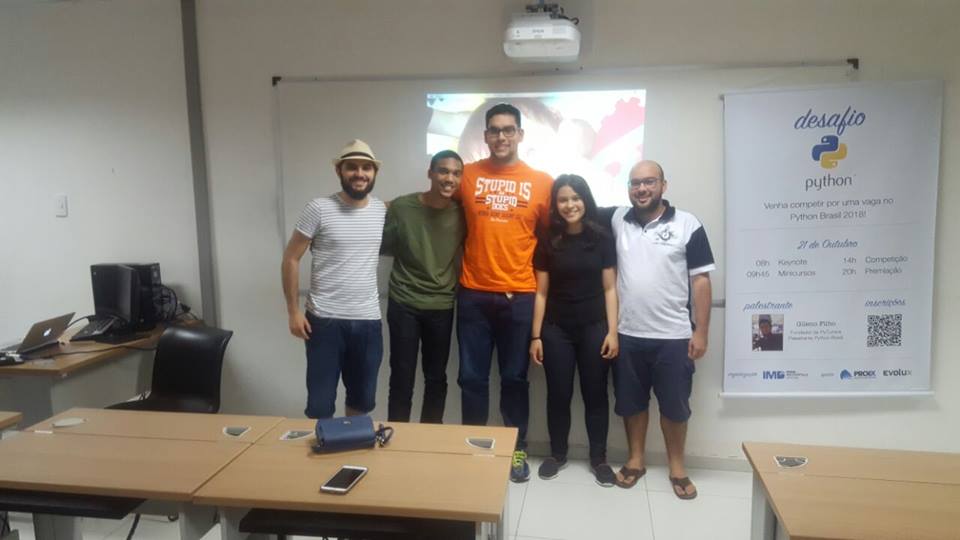
This work was developed during the “Python IMD challenge” happened on 10/21/2017 with Igor, Ricardo, Luiza and me. The competition purpose was to develop a project involving Data Science during 5 hours. Our goal focused on choosing something impactful and at the same time simple to be developed in the short given time. We were very happy to know that we won the first position in the competition at the end! The prize is a free ticket to the national Python event that is going to happen next year.

eqp.jpg

Without further ado, let’s talk about the project itself!

During our searches for datasets about various topics, we found the national website which contains numerous pre-formatted data about national interests:   http://dados.gov.br/

The subject that called our attention was about the Basic Health Units of Brazil (Unidade básica de saúde), which are small public hospitals basically. The dataset had some interesting columns that we thought could bring an important conclusion, for example, the hospitals coordinates and their evaluation about different aspects like the hospital structure and medical supplies.

Continue reading